Baking for the Market


We have begun to sell our baking at the Farmer's Market in Fort Nelson. I sell my soap and some paintings at the market, as well.


We make cinnamon buns, always popular along the Alaskan Highway up here, sold in packs of 4 or 6. Occasionally we will sell them individually, but not often.


Lloyd usually makes the cinnamon buns and he makes the most wonderful bread! He makes the Raisin Bread and the Honey White Dinner Rolls that are called "monkeybread". 


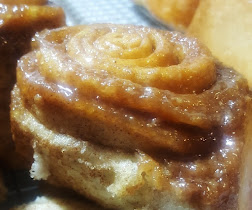
"Monkeybread" is a common name given to groups of small buns that are pulled apart by hand. All of the things that he makes for the market are very popular and fly off the table! 


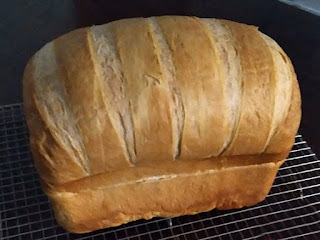
I bake the cakes and always have done. I make chocolate cake, lemon cake, cherry almond and occasionally coconut to sell at the market and I make cupcakes. I often sell half a cake as well and very occasionally I will sell a whole, round cake. 

The cupcakes and cake slices are gaining in popularity as everyone tries them. Lemon is rapidly becoming the favourite variety. They are made with real fruit, as are the cherry-almond cakes!


The baking keeps us hopping all week. I usually hit the floor running in the am Mon-Fri and start baking immediately. While whatever I'm making is rising, I can start my day and do other things. If I'm baking cakes there is no rising time, of course, but there is the baking time and the cooling time. They have to be completely cooled before I can frost them. Somewhere during this time, I make soap in another room. It's never mixed with the food prep. 

We usually take Sat and Sun off. Saturday is a given, as I am at the market all day anyway and Sunday is a rest day. Its The Lord's worship  day set aside, as well as a needed rest day for us, a day we sit and do nothing but snooze all day. No baking allowed!

We bake a large variety of things every week but they usually center around types of bread, cakes and cookies. We only make shortbread cookies. We have found that they are the only ones that sell. 

Everything considered, I like the baking. I putter at it. I'm not rushed and I can focus on all the little things that go into it. I think it's the Lord's path for us right now as things seem to be falling in place and He blesses our efforts. All we can do is pray, acknowledge him in all that we do and trust Him to guide our path.

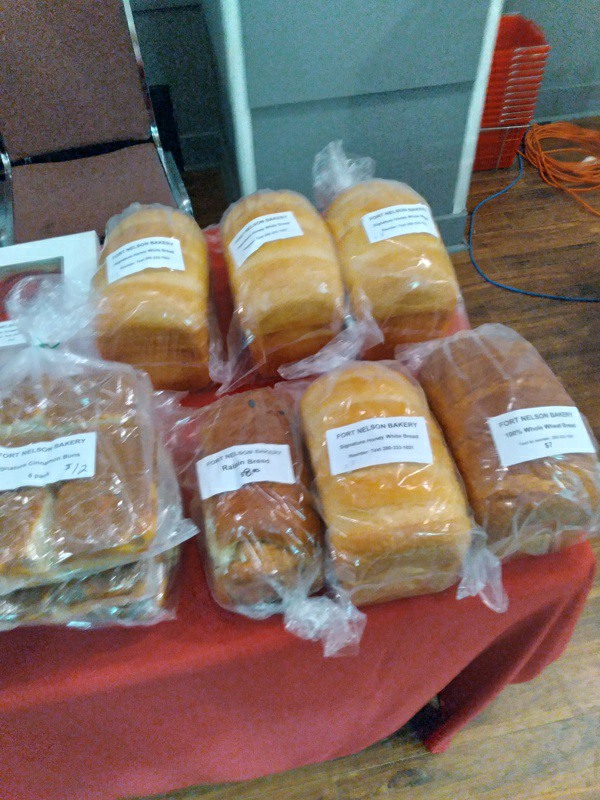
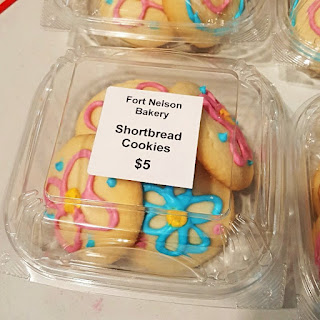
If you are in the Fort Nelson area on a Saturday, come out and shop! The Farmer's Market is in the Elk's Lodge on the highway across from the Lamplighters and the Rec Center. 


Quiche


We eat quiche about once a month. It uses up all the bits of meat and veggies I have left over from meals. I toss them all into a bag in the freezer to add to quiche or stew. Almost any meat and veggie is good in quiche, finely chopped and cooked until soft. This one has peas, carrots, yellow beans, corn, onions, mushrooms and all beef sausage, grated cheddar and lots of parmesan, since that's what I had in the freezer. (I add parmesan to everything!) 

I put all the additions in a large bowl, add about 3/4 cup of whole milk for this large size, then fill up the rest with eggs and whisk it all together until well blended. It should be filled at least about 1/3 with eggs. (This large size took 10 eggs!) I put the cheese on the bottom of the pastry, then add the egg mix. Its best if the cheddar is on the bottom so it doesn't get to dry or too brown on the top. If you don't know how much volume your dish holds, fill the empty dish with water and pour into a large measuring cup or bowl, marking the level on the bowl so you know how much filling to make for your quiche.

I usually cook the meats first and finely chop them or use leftovers. Beef-pork-moose sausage, bacon, ham, ground beef or ground/chopped moose and poultry are all good in quiche, or a mix of any. I don't use poultry by itself in quiche, but its good with the addition of some bacon. I will add fresh things if I don't have enough in the freezer bucket. The same goes for stew. I make stew from the freezer bucket of left overs too and add left over gravies and sauces to it, as well, but only to stew, don't put liquids in a quiche. Stew with a mix of well cooked meats is very good! 

It doesn't need much in the way of seasoning, since all the things saved are already seasoned. I add 1/2 teaspoon of salt to a quiche, since the eggs need it, and I add a liberal amount of pepper to both, but that's just personal taste. I also add garlic plus to both, but just a light sprinkle. 

Quiche is good for breakfast, lunch and dinner! Just add some biscuits or rolls and it makes a great meal! 

Bake the quiche until the center rises up and sets firmly and the top browns. This is a very large one and took 1 hour and 20 mins to cook at 350F. It's perfect! I would put a guard on the pastry edge to keep it from burning before the center is done. 

A good quiche is not all about the filling. Flaky, tender pastry is part of a good quiche too! 


Biscuit Trials


I have several recipes for biscuits, also called "scones", that I have used and perfected over the years. Three main ones stand out. They are the sour cream, the sourdough and the buttermilk biscuits. All three get rave reviews. All three are light, flaky and delicious! Recipes for all three biscuits and the sourdough starter are below.

I have decided to bake all three and see which one we like the best. The sour cream biscuits are the most expensive to make and I don't always have sour cream for them, the buttermilk biscuits are a LOT of work and I don't always have buttermilk. I'm thinking I might stick with the sourdough biscuits for most of my baking. 

To this end, I have made some sourdough starter. It will be kept in the fridge and fed after use. I might also use it for bread and other sourdough baking. For most of my adult life, I have kept sourdough in the fridge and made mostly sourdough biscuits. I quit doing that about 10 years ago and started making the sour cream biscuits instead. We love the sour cream biscuits and they are delicious, but I don't always have sour cream and its expensive. 

*A note about sour cream and buttermilk. I make my own buttermilk. Since I use cultured buttermilk from the store as starter, its exactly the same. It makes at room temperature, easy! Read my earlier post about making your own buttermilk. Sour cream is made with the same bacteria in cream, rather than milk, so I have looked into making sour cream myself, as well.  After checking out the price of full fat cream, I found that buying sour cream is cheaper than making it from cream at home. Go figure...so...I just buy it, but it is still expensive. 

*********************************

You can find the sourdough starter recipe and the sourdough biscuit recipe, in my post "Sourdough"  The sour cream and buttermilk biscuit recipes are below.

Another thing to NOTE from my current experience with biscuits: I prefer using a glass pan. If using a glass pan, turn the heat down 25 degrees, i.e. from 375 to 350. In a glass pan, the bottom of the biscuits are no darker than the top. 


*********************************

SOUR CREAM BISCUITS

Ingredients: 

2 cups flour - 2 teaspoon baking powder - 1/3 cup sugar - 1/4 teaspoon salt - 1/4 cream of tarter (optional) - 1/2 cup shortening/lard - 1/2 cup sour cream - 1/2 cup milk

Preheat oven to 425F. Sift all dry ingredients together in a large bowl. Cut in lard with pastry blender until well mixed. Mix all other ingredients together in a separate bowl. Pour into the dry mix and gently fold together just until well blended. Turn out onto a floured surface. Gently shape into a rectangle with floured hands. Cut into squares with a floured knife. Place onto a lightly greased pan or use parchment paper. Bake in a preheated oven at 425F for 15 minutes. 

*********************************

BUTTERMILK BISCUITS

Ingredients: 

1/2 cup butter - 2 1/2 cups all purpose flour - 1 1/4 teaspoon salt - 3 3/4 teaspoon baking powder - 1 cup cold buttermilk

Directions:

Freeze butter and grate using largest holes. Add dry ingredients together, mix and add grated butter and blend. Refrigerate 10 minutes. Preheat oven to 475F. Add buttermilk. Stir 15 times. Turn out on a floured surface. Roll out into a 1/4" thick rectangle. Fold in half and roll out again into a 1/4" rectangle. Repeat the fold and roll directions three more times. Cut ending rectangle into squares with a knife. Place biscuits onto an ungreased pan or use parchment paper. Bake at 475F or 15 minutes. 


Starting & Using Sourdough

We like sourdough biscuits, so I keep sourdough in my fridge all the time. I also plan to make sourdough bread, but that has been my plan for a couple of decades and I haven't gotten to it yet...but I'm determined to get to it this month...or maybe next month... 

Sourdough is not really "sour", it a fermentation of regular bread yeast in flour and water with a little sugar to feed the yeast. This wet and growing yeast is kept in the fridge and added to anything that needs rising or flavour. I like to add it to pancakes, even ones made from a mix in a box. (I often make them from scratch and they are fabulous, especially  with sourdough added!)


After using the sourdough, it has to be fed and left to sit out overnight until bubbly again. It is then kept in the refrigerator, as before. 

The metal lid on my jar, in the above photo, has a rubber coating inside and a seal. I would not recommend keeping it in anything with metal in contact with the sourdough. Its quite acidic. 

Sourdough can be frozen for about three months and still be good for drinking. It can be kept longer for cooking but will start to separate after the three months. 

I freeze it in ice cube trays and then put the cubes in a labelled freezer bag. I do this with a lot of things. 


*********************************

SOURDOUGH STARTER RECIPE

Ingredients: 

1 cup milk - 1 cup hot water - 1 tablespoon sugar - 2.5 cups flour all-purpose - 2 1/4 teaspoon dry yeast

Directions: 

Mix the milk, hot water and sugar together in a large bowl. When it is cool enough, (around 90-100 degrees F) add the yeast and flour. Stir well and let it sit until bubbly. Make sure the bowl is big enough, as it will rise a lot when it starts to ferment. Cover lightly with a towel and let sit 24 hours. Put into a container that is big enough to hold it when it rises and has a lid. Once it has risen and bubbled, keep refrigerated. Feed after using and let sit out until bubbly. 

To feed after using: Add 1 cup flour, 1 cup water and 1/4 cup sugar. Stir well and let sit until bubbly. NOTE: This is strictly for biscuits. If you want to make sourdough bread, put a little starter in another jar and feed with just equal amounts of flour and water only. No sugar and water instead of milk, unless milk bread is your goal. I keep two sourdough jars, one for each item, and well labelled. 

*********************************

SOURDOUGH BISCUITS


Ingredients:

½ teaspoon salt - 1 cup flour all purpose - 2 teaspoons baking powder - ¼ teaspoon soda - 1/3 cup shortening - 1 cup sourdough

Directions: 

Preheat oven to 275F. Mix all dry ingredients together in a large bowl. Cut in the shortening with a pastry blender. Stir in the sourdough. Gently squeeze together until fairly well mixed with floured hands. Turn out onto a floured surface and gently shape into a rectangle with hands. Cut into squares with a knife that is dipped regularly into flour. This dough is sticky inside. Place on pan with parchment paper or lightly greased pan. These are best if made small and kept tall and can be reshaped after cutting and placing on pan. They will spread slightly. If possible, let rise some before baking. 

Bake in a preheated oven at 375F for 15-20 mins. 


Tortiere


Tortiere! Its a favourite dish at our house.  Its the traditional French Canadian Christmas Eve fare but is  good anytime, especially on a cold winter's night. It's a meat pie, spiced with nutmeg and onion and its delicious! We make ours with pork, which is the usual recipe in Quebec, from which this dish comes. We prefer the juicy tenderness of pork, but I have made it with medium ground beef before.  

Here is our recipe. I got it from my mother in law and its the best I have ever eaten, much like most of the other food she makes.

Tortiere:
Ingredients:  Top and bottom pastry for one pie
2 lbs of ground pork or a pork/beef blend
1/2 a large sweet onion
1 teaspoon salt
1/4 teaspoon pepper
1/2 teaspoon nutmeg
Dash of mace
Tablespoon of beef bouillon


Directions: Mix all together in a pot on the stove and cook until the onion is tender. The meat should be fully cooked but tender. Add 1.5 tablespoons of cornstarch. Pour into a pie crust, put top crust on and bake at 350F until the pastry is nicely brown, about an hour. Let sit for about 20 mins until cool enough to cut and eat. May also be thickened with potato flakes instead of corn starch. Serve hot with vegetables and potatoes. 


Banana Wine


This week I am making banana wine. I have made many various types of wine from all kinds of things edible, but this is a first for the banana. 

I am making five gallons of wine, so needed a lot of bananas. They were, of course, green when I bought them, so I had to leave them sitting out at room temperature for a week or so, until they were very ripe. They needed the brown spots on the peel, but no rotten areas. I bought regular bananas so didn't use the peel from those. Non-organic bananas are sprayed with all kinds of things, since people don't eat the peel. I also bought a few large bunches of organic bananas so I could add the peel, as well. I peeled and chopped all the bananas yesterday. 

I recently bought a 40 pint pot with lid, for making wine as well as soup, etc. I filled it half full of water and started to heat it on the stove, before I began to process the bananas. As I peeled and chopped the bunches of bananas, I added them to the pot. I eventually brought all the bananas to a boil in the pot. They boiled for about 10 mins, then I turned off the heat and let it cool. After it cooled some, I used a strainer and scooped out all the banana pieces and mashed them to leave most of the juice/water in the pot. I'll need all of that to make wine. The cut, boiled and mashed bananas went into the garbage. If it were summer, I would compost this, if not for bears. Composting is not recommended here in Fort Nelson, because it draws bears. 

It's important to note here that everything has to be sterilized. The strainer, spoon(s), etc. pot, primary fermenter, thermometer, hydrometer...everything! 

After boiling the bananas for about 10 mins, I used a sterilized strainer and poured the pre-wine liquid (also called "must) into the primary fermenter, previously sterilized. Its basically just an extra large food grade plastic container. It doesn't need a lid and if it has one, its not recommended to seal it closed. The day before I had sterilized the primary fermenter and half filled it with water so the chlorine would evaporate. I poured the very hot must from boiling the bananas directly into the primary fermenter. With the room temperature water already in there, it wasn't too hot for it. 


The acid blend and pectic enzyme were added immediately and stirred well. The fermenter was partially covered to keep out the dust, etc until the liquid is cool enough to put in the wine yeast. If its too hot, it will kill the yeast. Room temperature or slightly warmer is fine. It makes for weeks at room temperature. 

While waiting for the must to cool, I added the sugar. With a hydrometer floating in the must, I added sugar, stirring constantly, until the reading on the hydrometer reached 8% while floating in the must. I'm making light wine with 8% alcohol. The must was stirred for awhile to dissolve the sugar. 

When the must was cool enough, I added a package of wine yeast. I like to use Lalvin E-1118. Its what I have used for decades and I like the taste. I have rarely had it fail. I sprinkled it on top of the liquid and gave it a light stir. Then the lid was put on but left slightly ajar. I have used this yeast to make wine sitting at 17% alcohol. To get much higher than that, you need a different yeast. The alcohol starts to kill off the Lalvin E-1118 yeast at around 17-18%. You can buy yeast for making whiskey that can get you around 21-22% alcohol under ideal conditions, but to get any higher than that, it has to be distilled or fortified. 

When the yeast get going, its vigorous enough for the first few days, to emit enough CO2 to prevent any bacteria from entering the must. Its also too vigorous for an air lock, so needs some space for the gas to escape. When the yeast is working, it creates a lot of foam on the top and has a clean yeasty smell.

After about 4 days, it will be slow enough to need an air lock to keep out the air but still let the gas escape. Then it gets racked into the secondary fermenter with a stopper (bung) housing an air lock. Both are sterilized and well rinsed before using. 

I did this today. This is what it looks like now. There are CO2 bubbles escaping constantly. It will continue to sit in this secondary fermenter with an air lock, until no more bubble escape. Then I will put in the hydrometer and see where the sugar level is at that time. When the sugar level reaches zero or even .999 (slightly less than zero), it will be finished. It can then be cleared, if not clear already, and bottled. I will rack (siphon) it into a glass secondary fermenter carbuoy to clear it before bottling. 

This is something different for me, since I have never made banana wine before. I got a taste of the new wine today, when siphoning it into the secondary fermenter. I think we are going to like this banana wine! Wines I have previous made are: one gallon of lilac, maple, dandelion, chocolate mint, mint, apple, sugar snap pea pod, and a few others I can't remember; five gallons of: rose petal, a favourite, x 2 (made twice), rhubarb x 2, crab apple, cherry, wild blueberry, apple, wild grape, ground cherries, strawberry, raspberry, wild field berry ( a wild black/red raspberry and blackberry mix), 

Update Jan 22: 

The banana wine has finished fermenting! I racked it into the clear glass secondary fermenter for clearing! Next up: time to bottle! 


Bone Broth and Dumplings

I have recently begun to make "bone broth" in my small pressure cooker. Bone broth is what you get when you cook for an extended time, the bones and connective tissue of meaty joints. Its the joints that are important and contain the collagen and silica. Cooking joints and bones in the pressure cooker significantly reduces the time. An hour under pressure is the same as just boiling for an entire day, but if you don't use a pressure cooker, you can gain the same thing by cooking the joints for a couple of days.

What you get from this is collagen, silica, gelatin, high protein, anti-inflammatory amino acids, glucosamine, chondroitin, B vitamins and a lot more.

Bone broth does not contain a lot of minerals, but if you add vegetables when you make the broth, they will add minerals. Save your onion skins, carrot and celery tops. These scraps, usually thrown away, will add a lot of flavour and minerals to your broth. Add any other vegetables and herbs to the pot with the bones, at the start, then strain the broth at the end of the cooking period. I like to add some carrots, onion, celery and garlic for flavour, a lot of spinach and parsley, also some bay leaves, thyme and oregano. If I had nettles in mid-winter, I would add those too. These all go into the pressure cooker with the bones and joints to cook for an hour under pressure. Other things I have considered adding to the pressure cooker, but have not done so yet, are dried plantain and calendula. it all gets strained out. If I want a few vegetables in my soup, I add them after, with the noodles.

If I'm not ready to use this immediately, it gets strained and put into the freezer. I usually freeze things like this in ice cube trays, then put into freezer bags for use in small amounts, as needed. 

I occasionally use this as a base for chicken noodle soup (pictured below), if made with chicken or turkey. I usually make stew with moose/beef joints. Bone broth can also be sipped by itself in a cup for a nourishing lunch or snack. 

I use wide, flat egg noodles in my soup. We like their texture a lot better than regular pasta noodles. I have used chopped spaghetti noodles, and they are good too, but we prefer the egg noodles and I think they freeze better. 


I recently made bone broth from a turkey. They are cheap just before Christmas! I deboned the whole turkey and used the carcass to make three pressure cookers full of bone broth. I made a lot of chicken noodle soup for the freezer from 2/3 of the total broth amount. I used the rest to make chicken stew for dinner tonight. I didn't have to add much in the way of vegetables, knowing what had gone into the broth. I did add potatoes, carrots and broccoli. 

For the first time in many years, I made dumplings, the easy way. I bought a can of Pillsbury Country Biscuits, the kind that comes in a spiral cardboard can. (No, they are no paying me anything for putting this in my blog.) I cut the raw biscuits into quarters and dropped them into the boiling stew, put on the lid, turned the heat down, and cooked for about 16-17 minutes. They were delicious and perfectly cooked, light, fluffy and delicious! 

I know I could not have made better dumplings from scratch! Using canned biscuits for dumplings is something my mother used to do and took a lot of criticism for, but now I see why. So easy, fluffy, tender and very, very good! I will never again make dumplings from scratch! 


Hostas, A Delicious Vegetable!


Spring is here in the far north! With the coming of spring, comes new growth in the forests and wild areas where the edible Ostrich ferns grow. Fiddleheads are the baby fronds not yet unfurled on Ostrich ferns.

The fiddleheads on the Ostrich fern can be identified by the papery covering that splits when the fiddlehead grows and the smooth stems with a deep, U-shaped groove on the inside.
They can usually be found growing wild all over a damp forest floor, along streams, riverbanks and swampy areas. They like wet ground. Sometimes you can find a patch with hundreds. 

When you pick the fiddleheads, leave several fronds (leaves) on each fern so it can make food with which to grow and survive for the next year. Forage responsibly. 

Before fiddleheads are edible, they have to be prepared properly. When raw, they can make you sick. 

When we eat fiddleheads, I boil them for 15 mins, drain and rinse several times. Then I toss them in a skillet with butter and garlic and sauté. They taste similar to asparagus and green beans. Delicious!! 

Fiddlehead Nutrition: 

Fiddlehead ferns (Matteuccia struthiopteris), Fresh, raw, Nutrition Value per 100 g, (Source: USDA National Nutrient data base)
PrincipleNutrient ValuePercentage of RDA
Energy34 Kcal1.7%
Carbohydrates5.54 g4%
Protein4.55 g8%
Total Fat0.40 g2%
Cholesterol0 mg0%
Vitamins
Niacin4.980 mg31%
Riboflavin0.210 mg16%
Thiamin0.020 mg1.5%
Vitamin A3617 IU120.5%
Vitamin C26.6 mg44%
Electrolytes
Sodium1 mg<1%
Potassium370 mg8%
Minerals
Calcium32 mg3%
Copper0.320 mg35.5%
Iron1.31 mg16%
Magnesium34 mg8.5%
Manganese0.510 mg22%
Selenium0.7 mcg1%
Zinc0.83 mg7.5%
Phyto-nutrients
Carotene-ß2040 µg--
Carotene-α261 µg--


From the Gov of Canada food safety website*.

Cleaning
  • Using your fingers, remove as much of the brown papery husk on the fiddlehead as possible.
  • Wash the fiddleheads in several changes of fresh, cold water to remove any residual husk or dirt.

Cooking

  • Cook fiddleheads in a generous amount of boiling water for 15 minutes, or steam them for 10 to 12 minutes until tender. Discard the water used for boiling or steaming the fiddleheads.
  • Cook fiddleheads before sautéing, frying, baking, or using them in other foods like mousses and soups.

Freezing

  • Clean the fiddleheads properly.
  • Boil them for two minutes.
  • Discard the cooking water.
  • Plunge the fiddleheads into cold water and drain.
  • Pack the fiddleheads in freezer containers or bags.
  • Store fiddleheads in the freezer for up to one year for best quality.
  • Follow the complete cooking instructions above before serving.

From the Maine, USA Gov Extension**: 

Canning Fiddleheads: 
  • UMaine Cooperative Extension does not recommend pressure canning as a method to preserve fiddleheads because process times have not been established and tested for home food preservation.
  • Commercial cider or white vinegar should be used and must have at least 5% acidity.
  • As guidance, approximately 3 pounds of raw fiddleheads should yield about 6 pints of pickled fiddleheads.
  • The brine should cover all the fiddleheads in the jar, while leaving a 1/2-inch headspace to ensure a proper seal.
  • Be sure to use best canning practices during the water bath process, which includes covering all jars in the canner with at least 1 inch of water and timing the boiling process when the water reaches a rolling boil (212 deg F) with all the jars in the canner.
  • Check for a proper seal on the jars after processed jars have cooled.  If the tops are not depressed or have “popped”, place these jars immediately in the refrigerator and eat the fiddleheads within 1 month.


Fiddlehead Recipes
Pearl barley risotto with fiddleheads, squash and walnuts
This is a recipe by Chef Kyle Christofferson, winner of the 2011 "So You Think You Can Cook" fiddlehead competition. ***
Ingredients:
50 g fiddleheads, trimmed and blanched
50 g roasted butternut squash, ¼ inch dice
50 g pearl barley (cooked to al dente)
15 g roasted walnuts, roughly chopped
1 tbsp butter
1 tbsp marscapone cheese
1 tbsp parmasean cheese
1 tsp chives
2 tbsp vegetable stock
¼ tsp sea salt
Directions:
1. Combine all ingredients in a medium sized saucepan over medium heat. Serve warm.

Sweet Pickled Fiddleheads

1 quart cider or white vinegar (5% acidity)
5 cups sugar
2 teaspoons canning & pickling salt
Clean and wash fiddleheads thoroughly using the process above. Mix vinegar, sugar and salt in a saucepan, bring to a boil and immediately pour over fiddleheads that are packed into clean pint jars. Remove air bubbles, adjust the liquid to 1/2-inch headspace and wipe the jar rim. Apply two-piece dome lids and adjust lids to fingertip tight. Process for 15 minutes in a boiling water bath canner, ensuring a rolling boil for the full 15 minutes and at least 1-inch of water is covering all jars in the water bath.
Makes approximately 6 pints if using 3 pounds of raw, cleaned and trimmed fiddleheads.

Shrimp and Fiddlehead Medley

1 pound fresh fiddleheads
6 ounces linguine, uncooked
6 cups water
1 ¾ pounds Maine shrimp, fresh or frozen
1 teaspoon olive oil
2/3 cup onion, chopped
1/2 cup green pepper, diced
1/2 pound fresh mushrooms, sliced
1 teaspoon thyme
1/4 teaspoon pepper
1/8 teaspoon salt
1/8 teaspoon celery seed
2 tablespoons lemon juice
Clean and wash fiddleheads using the process above. Bring water to a boil in a large saucepan, add shrimp and cook 3-5 minutes, or until slightly opaque white in color (frozen shrimp may take longer). Drain well, and set aside. Cook fiddleheads in boiling water (enough water to cover all fiddleheads during cooking) for 15 minutes. Drain. Meanwhile, cook pasta as directed, without salt or oil. Drain well, set aside and keep warm.
Add olive oil to a large, nonstick skillet and heat on medium high. Add onion and green pepper and sauté until crisp-tender. Stir in fiddleheads. Add sliced mushrooms, thyme, pepper, salt and celery seeds to vegetable mixture; stir well. Cook, uncovered, over medium heat 3-4 minutes or until mushrooms are tender, stirring often. Stir in shrimp and lemon juice; cook until heated through, stirring often.
Place pasta on a large platter. Spoon shrimp and fiddlehead mixture on top. Serve immediately.
Serves 6.

Fiddlehead Dijon

1 ½ pounds fresh fiddleheads
1 tablespoon cornstarch
1 cup nonfat buttermilk
2 teaspoons Dijon mustard
3/4 teaspoon lemon juice
1/2 teaspoon dried tarragon
1/4 teaspoon pepper
Clean and wash fiddleheads using the process above. Place fiddleheads in a vegetable steamer over boiling water. Cover and steam 12 minutes or until tender, but still crisp. Set aside, and keep warm.
Combine cornstarch and buttermilk in a small saucepan, stir well. Cook over medium heat until thickened and bubbly, stirring constantly. Remove from heat; stir in mustard, lemon juice, tarragon and pepper.
Arrange fiddleheads on a serving platter. Spoon sauce over fiddleheads. Serve immediately.
Makes 6 servings.


*https://www.canada.ca/en/health-canada/services/food-safety-fruits-vegetables/fiddlehead-safety-tips.html
**https://extension.umaine.edu/publications/4198e/
***https://www.chatelaine.com/health/diet/fiddleheads-are-a-great-source-of-vitamins-a-and-c-eat-them-while-you-can/